皆さんは、Google Home (Nest) をただのスマートスピーカーとして使っているだけで、本当の可能性を見逃していませんか?
本記事では、Google Home に独自のフレーズを発話させたり、任意の音声や音楽を再生させる方法について、具体的な手順や実例を交えて解説します。これにより、よりパーソナライズされたスマートホーム体験が実現できるでしょう。
なぜこの機能を作ったのか?
我が家は4人家族ですが、私以外の家族はITにあまり興味がなく、スマートスピーカーなどのIoT機器を自分で操作するのは難しい状況です。
そこで、誰もが手間なくITの恩恵を受けられるよう「通知機能」を自動化することにしました。
通知はスマートホームの基本機能であるため、さまざまなプログラムから汎用的に呼び出せるよう設計して実装しています。
ITを意識せずに家族のQOLを上げたい!
実現したいこと
- 任意のGoogle Homeに言葉を渡して喋ってもらう
- 下記の3種類のいづれかの方法でGoogle Homeから音声を出す
- 指定した言葉 (文字列)
- ローカル上にある音声ファイル (ローカル上のファイルパスを指定)
- Web上にある音声ファイル (Web上のURLを指定)
- 他のPythonプログラムからライブラリとして呼び出せる
- 発話させるGoogle Homeを事前に設定できる
- 発話までのレスポンスを可能な限り短くする
必要な準備と用意するもの
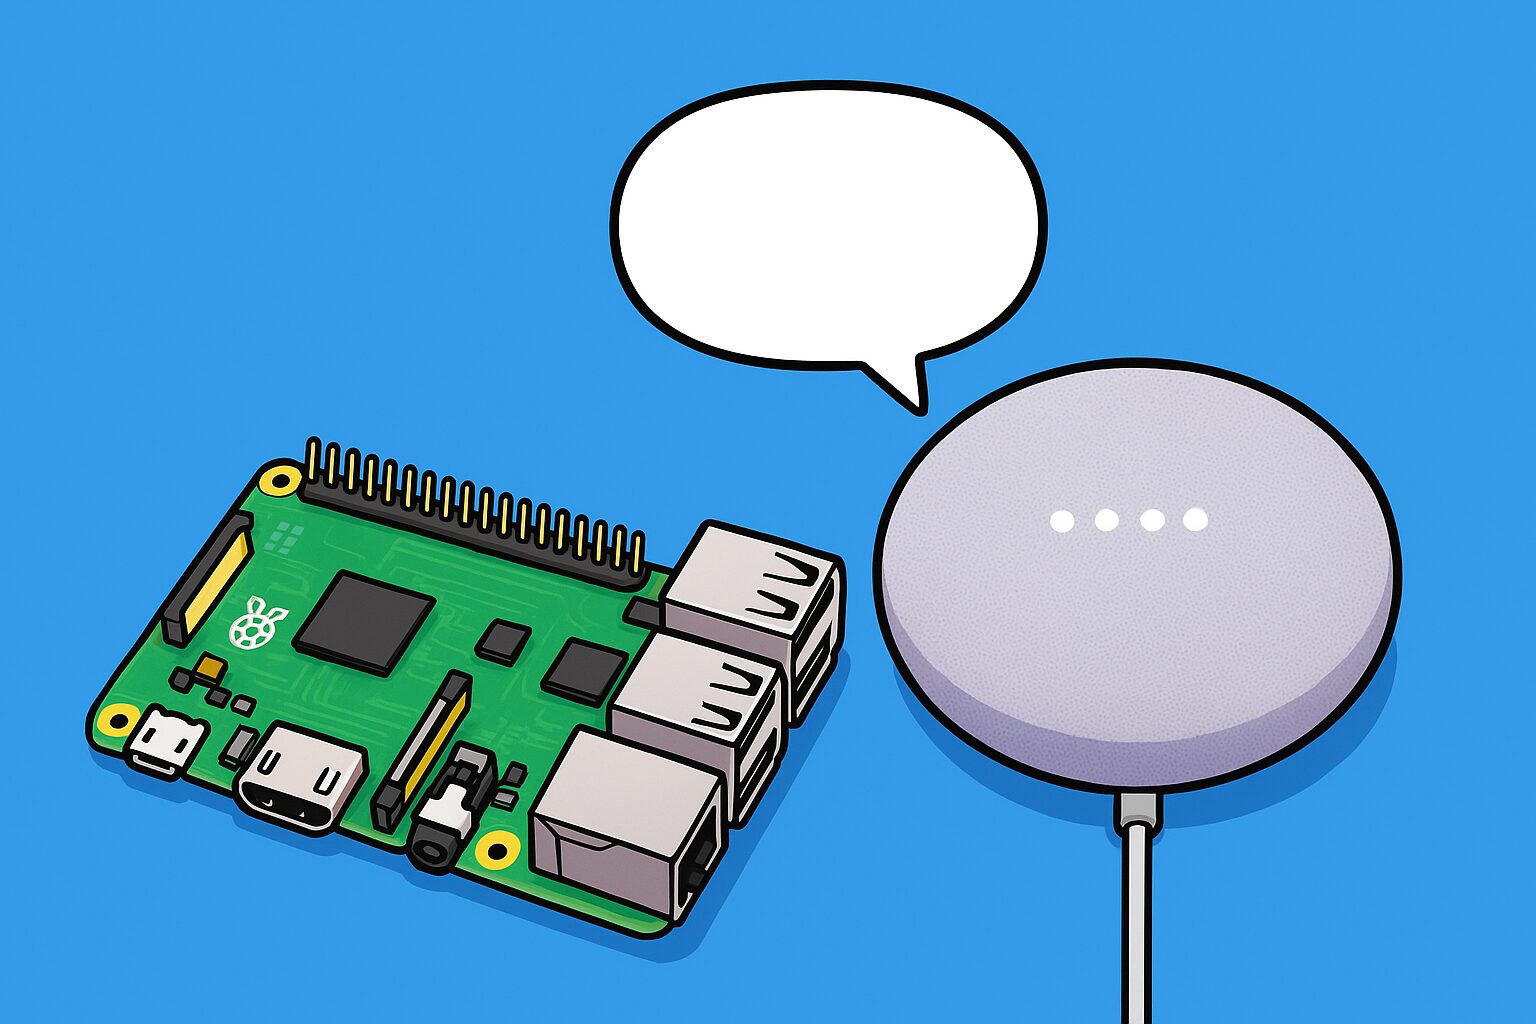
- Raspberry Pi(例:Raspberry Pi 4)
- Google Home (Nest)
- Python
- subprocess
- Node.js
- google-home-notifier
実装のポイント
最終的にはPythonから呼び出したいので一般的には「pychromecast」を使うのが普通かと思いますがレスポンスや安定性を考慮し「google-home-notifier」を使ってGoogle Homeに発話させる方針としました。
pychromecastの特徴
多機能・柔軟性が高い
Google Cast プロトコルを利用して音声だけでなく動画や画像などの各種メディアをキャストできるため用途が広い
細かい制御が可能
再生、停止、シーク、音量調整など、メディア再生の詳細な操作が行える
複数のデバイスに対応
Chromecast やその他の Google Cast 対応デバイスにも利用できる
セットアップがやや複雑
音声ファイルを再生する場合に別途 HTTP サーバーでホストするなど、環境構築の手間がかかる
通知専用ではないためのオーバースペック感
シンプルな通知機能だけを使いたい場合には、機能が多すぎて設定が冗長に感じる可能性がある
TTS機能が内蔵されていない
発話させるたびに音声ファイルを作成する必要がある
google-home-notifierの特徴
通知専用に特化している
テキストをGoogle Homeでしゃべらせるために設計されており、シンプルな使い方で通知を送信できる
セットアップが簡単
必要最低限の設定で動作するため、すぐに試せる点が魅力
TTS機能が内蔵
メッセージを自動でテキスト読み上げに変換し、Google Home で再生するための手順が簡略化されている
機能が限定的
通知やテキスト読み上げに特化しているため、メディア再生や細かい再生制御などの機能がない
柔軟性に欠ける
カスタマイズや複雑なシナリオへの対応が難しく、用途が通知や簡単な音声再生に限定される
メンテナンス状況に依存
プロジェクトによっては更新頻度が低い場合があり、将来的な互換性やサポート面で注意が必要になる
事前準備
google-home-notifierのインストール
Node.jsのnpmパッケージである「google-home-notifier」をインストールします。
インストール方法は下記の通り。
まずは任意のフォルダに移動します。
できればプログラムを格納するフォルダより上位のフォルダが良いかと思います。
cd /home/<username>/projects/nodelib次に「google-home-notifier」をインストールして「google-tts-api」をアップデートします。
npm install google-home-notifier
npm update google-tts-api
しかし、このままだと発話する際に次のエラーが発生してしまいます。
Error: get key failed from google
    at /home/<username>/projects/nodelib/node_modules/google-tts-api/lib/key.js:27:13
    at process.processTicksAndRejections (node:internal/process/task_queues:95:5)
解決するために「package.json」の内容を一部書き換えます。
  "dependencies": {
    "body-parser": "^1.15.2",
    "castv2-client": "^1.1.2",
    "express": "^4.14.0",
    "google-tts-api": "0.0.6", <-- ここを「0.0.6」に変更する
    "mdns": "^2.3.3",
    "ngrok": "^2.2.4"
  }
そして「google-home-notifier」のインストールフォルダに移動してから、もう一度「google-tts-api」をアップデートします。
cd /home/<username>/projects/nodelib/node_modules/google-home-notifier
npm update google-tts-api
これで「google-home-notifier」の準備は完了です。
実装方法
まずはNode.jsで発話させるプログラムを作成し、そのプログラムをPythonから呼び出せるようにします。
最終的には下記のようなフォルダ構成にします。 (お好みでフォルダ構成は変えてください)
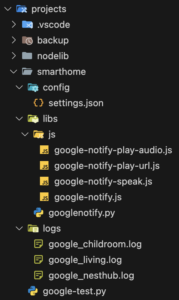

Node.jsのプログラムを作成
Javascriptのプログラムは4種類ありますが、それぞれの役割は下記の通りです。
- google-notify.js:Google Homeで発話する (下記の2〜4のプログラムから呼び出される)
- google-notify-speak.js:指定した言葉を喋る (Pythonから呼び出される)
- google-notify-play-url.js:Web上にある音声ファイルを再生する (Pythonから呼び出される)
- google-notify-play-audio.js:ローカル上にある音声ファイルを再生する (Pythonから呼び出される)
Google Homeで発話するプログラム (メインの処理)
"use strict";

const googlehome = require('/home/<username>/projects/nodelib/node_modules/google-home-notifier');
const language = 'ja';

exports.initGoogleHome = function (googleHomeIp) {
    googlehome.device(null, language);
    googlehome.ip(googleHomeIp);
}

exports.speakGoogleHome = function (text) {
    googlehome.notify(text, function (res) {
        console.log('googlehome_res : ' + res + '   speech_text : ' + text);
        if (res == 'error') {
            console.log('Google Home is not found. Get the new ip address.');
            initGoogleHome();
            googlehome.notify(text, function (res) {
                console.log('googlehome_res : ' + res + '   speech_text : ' + text);
            });
        };
    });
}

exports.playGoogleHome = function (url) {
    googlehome.play(url, function (res) {
        console.log(res);
        while (res === undefined) {
            console.log(res);
        }
        console.log('googlehome_res : ' + res + '   speech_url : ' + url);
        if (res == 'error') {
            console.log('Google Home is not found. Get the new ip address.');
            initGoogleHome();
            googlehome.play(url, function (res) {
                console.log(res);
                while (res === undefined) {
                    console.log(res);
                }
                console.log('googlehome_res : ' + res + '   speech_url : ' + url);
            });
            return true;
        };
        return true;
    });
    return true;
}
指定した言葉を喋るプログラム (文字列を指定)
"use strict";

const googleNotify = require('./google-notify');

// コンソール出力
console.log(process.argv.length);
console.log(process.argv[0]);
console.log(process.argv[1]);
console.log(process.argv[2]);
console.log(process.argv[3]);

// コマンドライン引数を取得
const googleHomeIp = process.argv[2];
const message = process.argv[3];

// GoogleHomeを初期化
googleNotify.initGoogleHome(googleHomeIp);
console.log('googleNotify.initGoogleHome');

// GoogleHomeで発話
googleNotify.speakGoogleHome(message);
console.log('googleNotify.speakGoogleHome');
Web上にある音声ファイルを再生するプログラム (Web上のURLを指定)
"use strict";

const googleNotify = require('./google-notify');

// コンソール出力
console.log(process.argv.length);
console.log(process.argv[0]);
console.log(process.argv[1]);
console.log(process.argv[2]);
console.log(process.argv[3]);

// コマンドライン引数を取得
const googleHomeIp = process.argv[2];
const url = process.argv[3];

// GoogleHomeを初期化
googleNotify.initGoogleHome(googleHomeIp);
// GoogleHomeで再生
googleNotify.playGoogleHome(url);
ローカル上にある音声ファイルを再生するプログラム (ファイルパスを指定)
"use strict";

const settings = require('/home/<username>/projects/smarthome/config/settings.json');
const googleNotify = require('./google-notify');

// コンソール出力
console.log(process.argv.length);
console.log(process.argv[0]);
console.log(process.argv[1]);
console.log(process.argv[2]);
console.log(process.argv[3]);

// コマンドライン引数を取得
const googleHomeIp = process.argv[2];
const fileName = process.argv[3];

// GoogleHomeを初期化
googleNotify.initGoogleHome(googleHomeIp);

// GoogleHomeで再生
console.log('http://' + settings.raspberrypi5_ip + ':' + settings.webserver.port + '/audio/' + fileName);
googleNotify.playGoogleHome('http://' + settings.raspberrypi5_ip + ':' + settings.webserver.port + '/audio/' + fileName);
ラズパイのローカルにある音声ファイルにアクセスするには、ラズパイ上でウェブサーバーを立ち上げた状態にしておいて、音声ファイルにURLでアクセスできるようにしておく必要があります。
ウェブサーバーの実装は別記事を参考にしてください。
Pythonのプログラムを作成
上記で作ったNode.jsのプログラムを、Pythonから「subprocess」を使って呼び出します。
# -*- coding: utf-8 -*-
# ------ 全Pythonプログラム共通の宣言 ----------------------------
# カレントディレクトリの移動など必須のインポート
import sys
import os
#os.chdir(os.path.dirname(os.path.abspath(__file__))) ※「libs」フォルダのプログラムはカレントディレクトリを移動しない
import requests
import json
# スマートホーム関連の共通設定情報一覧を取得
json_file = open("/home/<username>/projects/smarthome/config/settings.json", "r")
settings = json.load(json_file)
# ------------------------------------------------------------
# このファイル固有のインポート
import subprocess
import smarthomelog

# 定数
class GoogleHome:
    LIVING = settings['googlehome']['living']['ip']
    CHILD_ROOM = settings['googlehome']['child_room']['ip']
    NEST_HUB = settings['googlehome']['nesthub']['ip']

def func():
    print(__name__)

class Notify:
    # コンストラクタ
    def __init__(self, googlehome: GoogleHome = GoogleHome.LIVING):
        self.googlehome = googlehome
        # ログ出力用のクラスをインスタンス化
        if self.googlehome == GoogleHome.LIVING:
            self.log = smarthomelog.Log(smarthomelog.LogType.GOOGLE_LIVING)
        elif self.googlehome == GoogleHome.CHILD_ROOM:
            self.log = smarthomelog.Log(smarthomelog.LogType.GOOGLE_CHILDROOM)
        elif self.googlehome == GoogleHome.NEST_HUB:
            self.log = smarthomelog.Log(smarthomelog.LogType.GOOGLE_NESTHUB)

    def speak(self, message):
        self.log.write(self.googlehome + ' ' + message)
        subprocess.check_call('node /home/<username>/projects/smarthome/libs/js/google-notify-speak.js "' + self.googlehome + '" "' + message + '"', shell=True)

    def play_url(self, url):
        self.log.write(self.googlehome + ' ' + url)
        subprocess.check_call('node /home/<username>/projects/smarthome/libs/js/google-notify-play-url.js "' + self.googlehome + '" "' + url + '"', shell=True)

    def play_audio(self, url):
        self.log.write(self.googlehome + ' ' + url)
        subprocess.check_call('node /home/<username>/projects/smarthome/libs/js/google-notify-play-audio.js "' + self.googlehome + '" "' + url + '"', shell=True)

# コマンドラインから実行された場合の処理
if __name__ == '__main__':
    # コマンドライン引数を取得
    args = sys.argv
    googlehome = args[1]
    output_content = args[2]

    print(googlehome)
    print(output_content)

    if output_content[0:3] == 'http':
        subprocess.check_call('node /home/<username>/projects/smarthome/libs/js/google-notify-speak.js "' + self.googlehome + '" "' + message + '"', shell=True)
    elif output_content[0] == '/':
        subprocess.check_call('node /home/<username>/projects/smarthome/libs/js/google-notify-play-url.js "' + self.googlehome + '" "' + url + '"', shell=True)
    else:
        subprocess.check_call('node /home/<username>/projects/smarthome/libs/js/google-notify-play-audio.js "' + self.googlehome + '" "' + url + '"', shell=True)
プログラム中で「smarthomelog」という自作ライブラリを呼び出しているため、別記事を参照して「smarthomelog」の準備をするか、このライブラリを使用している箇所をコメントアウトするか削除してください。
各種設定用のJSONファイルの準備
{
    "raspberrypi5_ip":"192.168.xxx.xxx",
    "googlehome":{
        "living":{
            "device":"Google-Home-Mini-xxxxxxxxxxxxxxxxxxxxxxxxxxxxxxxx",
            "friendly_name":"リビングのGoogle Home",
            "ip":"192.168.xxxx.xxx"
        },
        "child_room":{
            "device":"Google-Home-Mini-xxxxxxxxxxxxxxxxxxxxxxxxxxxxxxxx",
            "friendly_name":"子供部屋のGoogle Home",
            "ip":"192.168.xxx.xxx"
        },
        "nesthub":{
            "device":"google-nest-hub-xxxxxxxxxxxxxxxxxxxxxxxxxxxxxxxx",
            "friendly_name":"リビングのGoogle Nest",
            "ip":"192.168.xxx.xxx"
        }
    },
    "log":{
        "path":{
            "google_living":"/home/<username>/projects/smarthome/logs/google_living.log",
            "google_childroom":"/home/<username>/projects/smarthome/logs/google_childroom.log",
            "google_nesthub":"/home/<username>/projects/smarthome/logs/google_nesthub.log"
        }
    },
    "webserver":{
        "root_directry":"/home/<username>/projects/smarthome/webserver",
        "port":"8000"
    }
}
動作確認
テスト実行用のPythonプログラムを作成して実行し、Google Homeから音声が出ることを確認してください。
# -*- coding: utf-8 -*-
# ------ 全Pythonプログラム共通の宣言 ----------------------------
# カレントディレクトリの移動など必須のインポート
import sys
sys.path.append('/home/<username>/projects/smarthome/libs') # これがないとsystemdで自動実行時に自作モジュールのImportで落ちる
import os
os.chdir(os.path.dirname(os.path.abspath(__file__)))
import requests
import json
# スマートホーム関連の共通設定情報一覧を取得
json_file = open("/home/<username>/projects/smarthome/config/settings.json", "r")
settings = json.load(json_file)
# ------------------------------------------------------------
# このファイル固有のインポート
import googlenotify

# Google Homeの事前準備
notify = googlenotify.Notify(googlenotify.GoogleHome.LIVING)

# 指定した文字を発話する
notify.speak('これはテストです。')

# ウェブ上のmp3ファイルを再生する (ライオンの声)
#notify.play_url('https://soundeffect-lab.info/sound/animal/mp3/lion-cry1.mp3')

# ローカルのmp3ファイルを再生する (実行するにはウェブサーバーの準備が必要)
#notify.play_audio('lion-cry1.mp3')
python googlenotify_test.py